
At ABC Fine ART we carry a wide range of wooden canvas stretcher bars. They vary in depth from 1/2 inch to 2 inches. Most commonly used are 3/4 inch bars for small to medium sized artwork. 1 1/2 inch bars are recommended for any artwork larger then 36 inches. There is only a slight difference in price so we recommend you make your choice based on which gives the best representation of your art. The thicker the stretcher bar, the more sturdy your piece will be.
 1. First you need a flat, clean, dust and dirt free work station. Make sure you have an absolutely smooth surface to work on, so your artwork or prints don’t get damaged. 2. Clean cotton or micro-fibre gloves are used throughout the process to make sure there are no smudges or fingerprints. 3. Unroll your artwork or canvas print carefully on your clean work station. For a 3/4 inch stretcher bar, you will need a minimum of 1 1/2 inch additional border space on each side of your artwork or print to properly fit around the bar. 4. Mark the corners of the printed area from behind so you will be able to place your stretcher bar on the backside of the canvas. The easiest way is to hold your canvas toward the light and see the edges of the artwork. Another way is to measure it. 5. With precision, outline your artwork from all sides on the back of the canvas. This is especially important if your artwork is large format such as this one.
Canvas Stretching Demonstration
Here we will show you the proper steps on how to do a canvas wrap. The following technique has traditionally been used by artists and craftsmen for hundreds of years. No glue or any other chemicals are used in this process and thus helps to preserve your artwork well into the future. 1. First you need a flat, clean, dust and dirt free work station. Make sure you have an absolutely smooth surface to work on, so your artwork or prints don’t get damaged.
  2. Clean cotton or micro-fibre gloves are used throughout the process to make sure there are no smudges or fingerprints.
  3. Unroll your artwork or canvas print carefully on your clean work station. For a 3/4 inch stretcher bar, you will need a minimum of 1 1/2 inch additional border space on each side of your artwork or print to properly fit around the bar.
 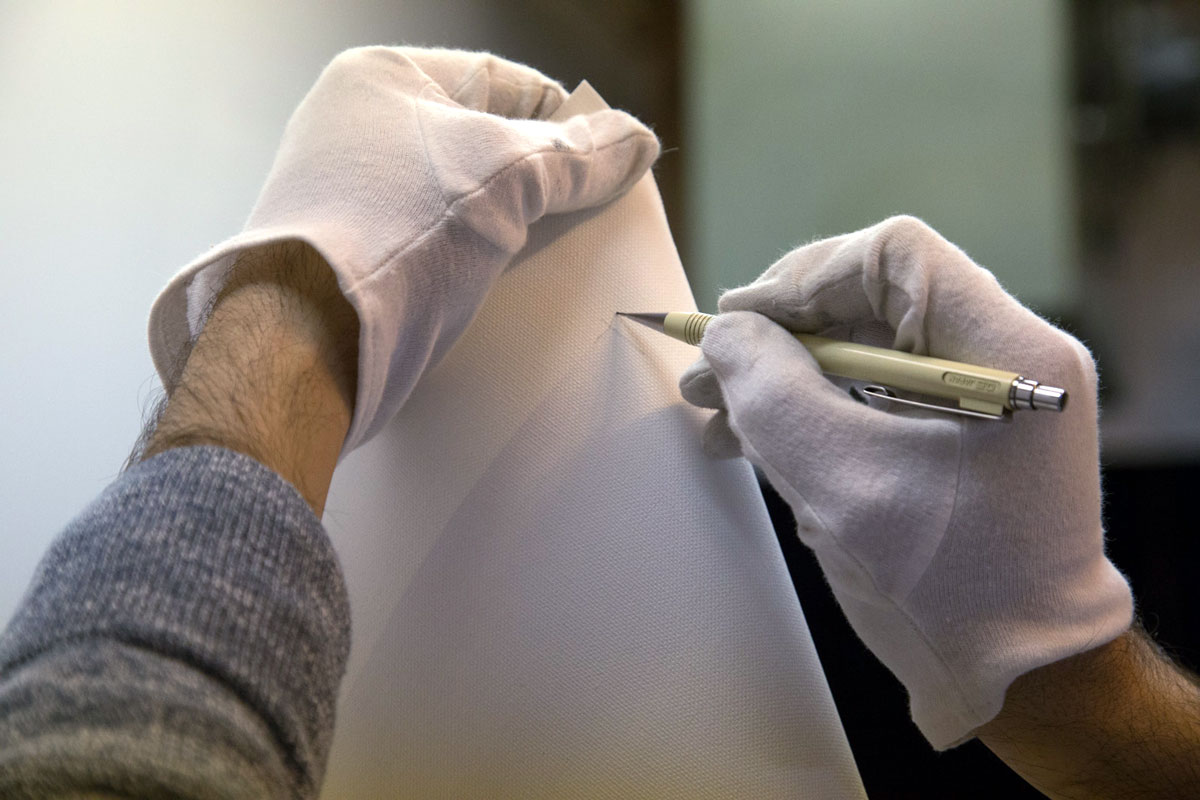 4. Mark the corners of the printed area from behind so you will be able to place your stretcher bar on the backside of the canvas. The easiest way is to hold your canvas toward the light and see the edges of the artwork. Another way is to measure it.
  5. With precision, outline your artwork from all sides on the back of the canvas. This is especially important if your artwork is large format such as this one.
6. After all outlines have been marked, turn over your artwork or canvas print faced down. Even though our workstation is very clean and totally flat, we still recommend putting some thin paper down to prevent it from touching the surface or being moved on table.

7. Now, place your stretcher bar on top of your artwork. Position it using the marks as guidelines. Make sure the flat side of the stretcher is facing up towards you. This way when you hang it, it will be straight.

8. To start with stretching, we place plastic clamps on the bars to hold the canvas to the stretcher bar on one side. You don’t need to put too much pressure as it might damage artwork.

9. Once the clamps are in place we can begin stretching the canvas over the bars and securing it with nails. You will do the opposite side of the clamps first. (* in this photo we have already secured the other side.)

10. It is important that you alternate sides when you are nailing. So put one nail in then do the same on the opposite side, do this all the way around your bar as shown in the photo.

11. At ABC Fine ART we use the traditional method of folding the corners rather than cutting them. This is more difficult to do but is well worth it, as it better conserves the artwork and makes it possible to re-stretch in the future if need be.

12.How to stretch the corners of your canvas: first fold in one side of the corner.

13. Then secure it with a nail.

14. Next, pull the edge and overlap the corner. Then nail it into place. And voila, you have finished your canvas stretching.

NOTE* You can use an original stretching pliers, in this case we are using a wide jawed set of vice grip pliers for grabbing the canvas.
